> ## Content Index
> Fetch the complete content index at: https://blog.anthea.day/llms.txt
> Use this file to discover other available public pages before exploring further.

# Vanilla Calendar：簡潔好看的日曆套件
- URL: https://blog.anthea.day/vue-js-vanilla-calendar/
- Published: 2022-11-06T16:06:43.000Z
- Updated: 2026-11-07T17:55:26.000Z
- Author: Anthea / 芫荽
- Tags: #Migrated-1792241843742, #Import 2026-10-17 12:57, Coding, Vue.js

#### 目錄

- 需求
- 日期區間
- input 點擊

---

### 需求

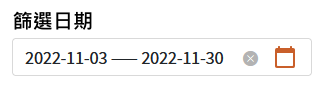
UI 設計完成的畫面希望可以選擇日期區間，並顯示在畫面上：

![](https://blog.anthea.day/content/images/2026/10/1-sozzmxdvoeefyfb03k4mhg.png)

UI 設計參考圖

需要做到的事情包含：

1. 可以點選兩個日期就產生日期區間
2. 點擊出現日歷，點其他地方或是結束選取時隱藏

#### 基本使用

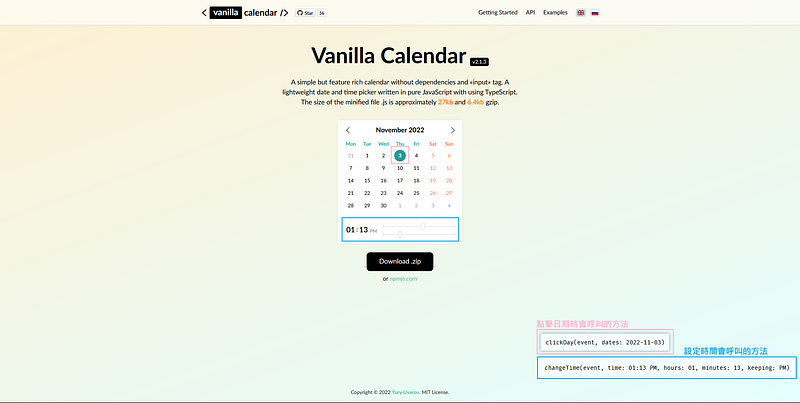
為了快速地達成需求，完全不考慮手刻，找到了這次的教學套件——[Vanilla Calendar](https://vanilla-calendar.frontend.uvarov.tech/?ref=blog.anthea.day)。首頁就放了一個可以操作的展示：

![](https://blog.anthea.day/content/images/2026/10/1-dpdpw9aqhfuq_k4xhtzlta.png)

基本的使用方法很簡單，將文件上的範例修改一下，就可以套用到 Vue 裡面：

```html
<!DOCTYPE HTML>
<html lang="en">

<head>
  <meta charset="utf-8" />
  <meta name="viewport" content="width=device-width, initial-scale=1.0">
  <link rel="stylesheet"
    href="https://cdn.jsdelivr.net/npm/@uvarov.frontend/vanilla-calendar@2.1.3/build/vanilla-calendar.min.css">
  <style>
    #calendar{
      width: 260px;
    }

    #picked-date{
      margin-top: 10px;
    }
  </style>
</head>

<body>
  <div id="app">
    <div id="calendar"></div>
    <div id="picked-date">選擇的日期：{{pickedDate}}</div>
  </div>

  <script src="https://unpkg.com/vue@3/dist/vue.global.js"></script>
  <script
    src="https://cdn.jsdelivr.net/npm/@uvarov.frontend/vanilla-calendar@2.1.3/build/vanilla-calendar.min.js"></script>
  <script>
    const app = Vue.createApp({
      data() {
        return{
          pickedDate: ''
        }
      },
      methods: {
        initCalendar() {
          let that = this;
          const calendarDefault = new VanillaCalendar('#calendar', {
            type: 'default',
            actions: {
              clickDay(event, dates) {
                that.pickedDate = dates[0];
              },
            },
          });
          calendarDefault.init();
        },
      },
      mounted() {
        this.initCalendar();
      }
    });
    app.mount('#app')
  </script>
</body>

</html>
```

![](https://blog.anthea.day/content/images/2026/10/1-cfp1nfwxrgheux7ucwwqfw.png)

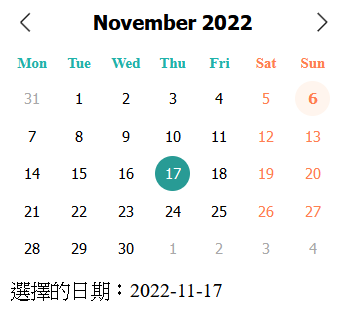
程式碼實作後的樣子

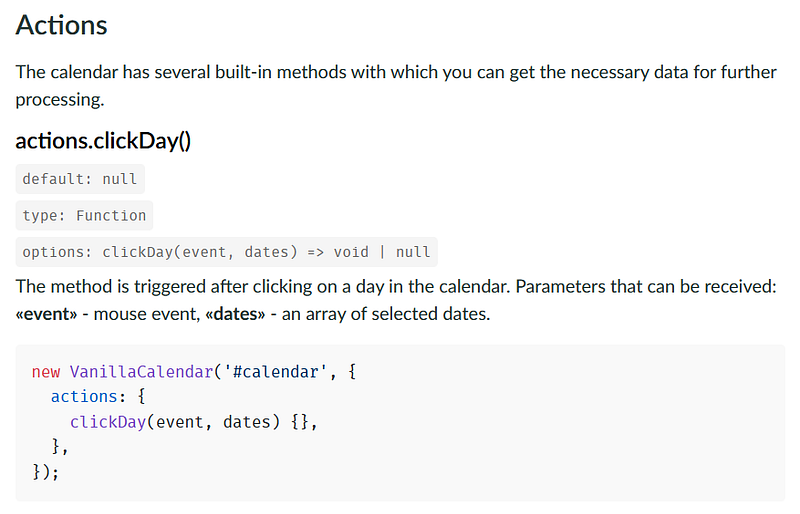
其中第 42 行的 `clickDay()` 是套件所提供的 [API](https://vanilla-calendar.frontend.uvarov.tech/api/?ref=blog.anthea.day)，讓我們可以在日曆點擊時進行一些處理，這個範例中是將點選到的日期加入 Vue 的 data 中，顯示在畫面上。

![](https://blog.anthea.day/content/images/2026/10/1-zvwyvstxhknjj1fc1lc6kq.png)

來自官網文件的使用說明

---

### 需求1\. 時間區間

原生日曆最無法支援的功能就是這個，所以我們先來看一下要如何讓我們的日曆可以選擇時間區間：

```javascript
const app = Vue.createApp({
  data() {
    return {
      pickedDate: ''
    }
  },
  methods: {
    initCalendar() {
      let that = this;
      const calendarDefault = new VanillaCalendar('#calendar', {
        // 加上設定
        settings: {
          selection: {
            // 可以選擇區間
            day: 'multiple-ranged',
          },
        },
        actions: {
          clickDay(event, dates) {
              let lastIndex = dates.length - 1;
              that.pickedDate = `${dates[0]}~${dates[lastIndex]}`;
          },
        },
      });
      calendarDefault.init();
    },
  },
  mounted() {
    this.initCalendar();
  }
});
app.mount('#app');
```

HTML 的部分不需要改動
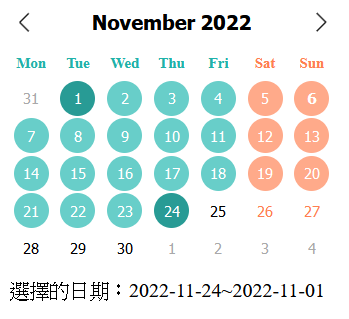
![](https://blog.anthea.day/content/images/2026/10/1-fwajfhf1scarnz5nlk3zng.png)

從上圖可以看到，現在我們能選取區間了，但因為我是先點選 11/24，才點選 11/01，所以存入的日期區間是反的，因此我們需要做點檢查：

```javascript
const app = Vue.createApp({
  data() {
    return {
      pickedDate: ''
    }
  },
  methods: {
    initCalendar() {
      let that = this;
      const calendarDefault = new VanillaCalendar('#calendar', {
        settings: {
          selection: {
            day: 'multiple-ranged',
          },
        },
        actions: {
          clickDay(event, dates) {
            let lastIndex = dates.length - 1;
            let firstDate = new Date(dates[0]);
            let lastDate = new Date(dates[lastIndex]);
            
            // 如果日期區間的第一個日期 (11/24) 大於最後一個日期 (11/01) 代表是反的
            if (firstDate > lastDate) dates.reverse();
            that.pickedDate = `${dates[0]}~${dates[lastIndex]}`;
          },
        },
      });
      calendarDefault.init();
    },
  },
  mounted() {
    this.initCalendar();
  }
});
app.mount('#app');
```
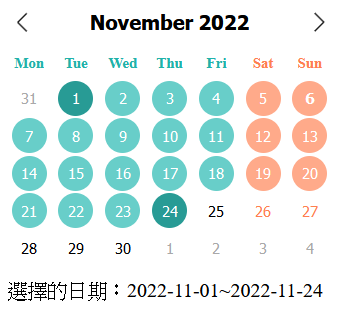
![](https://blog.anthea.day/content/images/2026/10/1-ulgy4x_ak4yn6jh-qxvkta.png)

---

### 需求2\. 樣式修改

第二個需求是希望能修改介面樣式，點擊的時候才出現，選擇完成或是點其他地方就取消。

根據官方文件的範例，我們稍作修改，放到 Vue 裡面：

```html
<!DOCTYPE HTML>
<html lang="en">

<head>
  <meta charset="utf-8" />
  <meta name="viewport" content="width=device-width, initial-scale=1.0">
  <link rel="stylesheet"
    href="https://cdn.jsdelivr.net/npm/@uvarov.frontend/vanilla-calendar@2.1.3/build/vanilla-calendar.min.css">
  <style>
    /* 設定日曆位置 */
    #app {
      position: relative;
    }
    #calendar {
      position: absolute;
    }

    #calendar,
    #picked-date,
    #popup {
      width: 260px;
    }

    /* 隱藏日曆 */
    /* 如果有套用 Bootstrap 可以不需要手動新增 */
    .visually-hidden,
    .visually-hidden-focusable:not(:focus):not(:focus-within) {
      position: absolute !important;
      width: 1px !important;
      height: 1px !important;
      padding: 0 !important;
      margin: -1px !important;
      margin-top: -1px;
      overflow: hidden !important;
      clip: rect(0, 0, 0, 0) !important;
      white-space: nowrap !important;
      border: 0 !important;
    }

    #picked-date {
      margin-top: 10px;
    }
  </style>
</head>

<body>
  <div id="app">
    <input type="text" readonly id="popup">
    <div id="calendar" class="visually-hidden"></div>
  </div>

  <script src="https://unpkg.com/vue@3/dist/vue.global.js"></script>
  <script
    src="https://cdn.jsdelivr.net/npm/@uvarov.frontend/vanilla-calendar@2.1.3/build/vanilla-calendar.min.js"></script>
  <script>
    const app = Vue.createApp({
      methods: {
        initCalendar(inputPopupEl, calendarDatepickerPopupEl) {
          let that = this;
          const calendarDefault = new VanillaCalendar('#calendar', {
            settings: {
              selection: {
                day: 'multiple-ranged',
              },
            },
            actions: {
              clickDay(event, dates) {
                if (dates.length > 1) {
                  // 選擇超過一個日期之後隱藏日曆
                  inputPopupEl.classList.remove('input_focus');
                  calendarDatepickerPopupEl.classList.add('visually-hidden');
                  
                  // 和原本的處理方式相同
                  let lastIndex = dates.length - 1;
                  let firstDate = new Date(dates[0]);
                  let lastDate = new Date(dates[lastIndex]);
                  if (firstDate > lastDate) dates.reverse();
                  
                  // 把日期區間填回 input 框
                  inputPopupEl.value = `${dates[0]}~${dates[lastIndex]}`;
                }
              },
            },
          });
          calendarDefault.init();
        },
        addToggle(inputPopupEl, calendarDatepickerPopupEl) {
          if (!inputPopupEl || !calendarDatepickerPopupEl) return;

          const togglePopup = (e) => {
            const input = e.target.closest('#popup');
            const calendar = e.target.closest('#calendar');

            if ((input && !input.classList.contains('input_focus')) || calendar) {
              inputPopupEl.classList.add('input_focus');
              calendarDatepickerPopupEl.classList.remove('visually-hidden');
            } else {
              inputPopupEl.classList.remove('input_focus');
              calendarDatepickerPopupEl.classList.add('visually-hidden');
            }
          };
          document.addEventListener('click', togglePopup, { capture: true });
        },
      },
      mounted() {
        const inputPopupEl = document.querySelector('#popup');
        const calendarDatepickerPopupEl = document.querySelector('#calendar');

        // 設定 Toggle
        this.addToggle(inputPopupEl, calendarDatepickerPopupEl);
        
        // 初始化日曆
        this.initCalendar(inputPopupEl, calendarDatepickerPopupEl);
      }
    });
    app.mount('#app');
  </script>
</body>

</html>
```

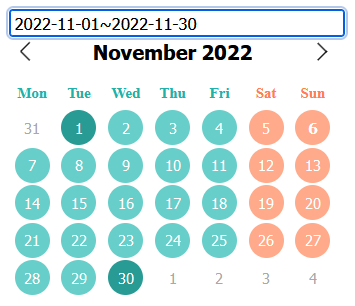
![](https://blog.anthea.day/content/images/2026/10/1-mhlzfsl43mbrrwrob_z9wq.png)

一個可以滿足需求的日曆就完成了

把 Toggle 和初始化拆開來進行的好處是，如果想要新增一顆清除已選擇區間的按鈕，就可以先把 input 中的值清空後，再次呼叫初始化的方法就好。

---

#### References

- [Vanilla Calendar](https://vanilla-calendar.frontend.uvarov.tech/examples/?ref=blog.anthea.day)